Percobaan II
Keypad dan 7 Segment
1. Prosedur [Kembali]
- Rangkailah seperti rangkaian berikut
- Buka Arduino IDE dan masukan listing program
- Upload program ke arduino
- Pilih tombol yang ingin ditekan dan amati keluarannya pada LCD

Gambar 1. Rangkaian Hardware


.jpeg)

5. Breadboard.jpg)


1. Arduino Uno

2. Keypad

3. LCD
.jpeg)
4. Kabel jumper

.jpg)
Diagram Blok: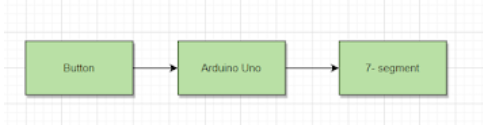


4. Flowchart dan Listing Program [Kembali]
Flowchart:

Listing Program:
//Percobaan 2
#include <Keypad.h>
const byte ROWS = 4; // Four rows
const byte COLS = 4; // Fou columns
char keys[ROWS][COLS] = {
{'1','2','3','A'},
{'4','5','6','B'}, // Keypad 4x4 layout
{'7','8','9','C'},
{'*','0','#', 'D'}
};
byte rowPins[ROWS] = {A4, A3, A2, A1}; // Connect to the keypad row pins
byte colPins[COLS] = {10, 11, 12, 13}; // Connect to the keypad column pins
Keypad keypad = Keypad(makeKeymap(keys), rowPins, colPins, ROWS, COLS);
const int segmentPins[] = {9, 8, 7, 6, 5, 4, 3, 2}; // Connect to the seven-segment display segment pins
void setup() {
for (int i = 0; i < 8; i++) {
pinMode(segmentPins[i], OUTPUT);
}
}
void loop() {
char key = keypad.getKey();
if (key) {
displayCharacter(key);
delay(1000);
clearDisplay();
}
}
void displayCharacter(char ch) {
// Define segment patterns for each digit (0-9)
// Example: Displaying '1'
// A
// F B
// G
// E C
// D
byte patterns[][9] = {
{0, 0, 0, 0, 0, 0, 1, 1}, // 0
{1, 0, 0, 1, 1, 1, 1, 1}, // 1
{0, 0, 1, 0, 0, 1, 0, 1}, // 2
{0, 0, 0, 0, 1, 1, 0, 1}, // 3
{1, 0, 0, 1, 1, 0, 0, 1}, // 4
{0, 1, 0, 0, 1, 0, 0, 1}, // 5
{0, 1, 0, 0, 0, 0, 0, 1}, // 6
{0, 0, 0, 1, 1, 1, 1, 1}, // 7
{0, 0, 0, 0, 0, 0, 0, 1}, // 8
{0, 0, 0, 0, 1, 0, 0, 1}, // 9
{0, 0, 0, 0, 0, 1, 0, 1}, //a
{1, 1, 0, 0, 0, 0, 0, 1}, //b
{0, 1, 1, 0, 0, 0, 1, 1}, //c
{1, 0, 0, 0, 0, 1, 0, 1}, //d
};
if ((ch >= '0' && ch <= '9') || (ch >= 'A' && ch <= 'D')) {
// Get the digit index (0-9) from the character
int index = (ch <= '9')? (ch - '0') : (ch - 'A' + 10);
// Write the pattern to the segment pins
for (int i = 0; i < 7; i++) {
digitalWrite(segmentPins[i], patterns[index][i]);
}
}
}
void clearDisplay() {
for (int i = 0; i < 8; i++) {
digitalWrite(segmentPins[i], HIGH);
}
}
Ketika keypad ditekan maka akan dibaca oleh Arduino dan, arduino akan memberikan perintah untuk menampilkan nilai yang ditekan tersebut pada Seven Segmen.
᭒ HTML↠ klik disini
᭒ Gambar Rangkaian ↠ klik disini
᭒ Video Demo ↠ klik disini
᭒ Listing Program ↠ klik disini
᭒ Video Demo ↠ klik disini
᭒ Listing Program ↠ klik disini


Tidak ada komentar:
Posting Komentar